[et_pb_section fb_built=”1″ _builder_version=”4.13.1″ _module_preset=”default” global_colors_info=”{}”][et_pb_row _builder_version=”4.13.1″ _module_preset=”default” global_colors_info=”{}”][et_pb_column type=”4_4″ _builder_version=”4.13.1″ _module_preset=”default” global_colors_info=”{}”][et_pb_text _builder_version=”4.13.1″ _module_preset=”default” global_colors_info=”{}”]
Exfoliate Before Tanning
It’s important to exfoliate prior to tanning. This will remove any dead skin and create the perfect base for your tan application. When exfoliating, pay extra attention to very dry areas like your feet, ankles, elbows, and knees.
[/et_pb_text][/et_pb_column][/et_pb_row][et_pb_row column_structure=”1_3,1_3,1_3″ _builder_version=”4.13.1″ _module_preset=”default” global_colors_info=”{}”][et_pb_column type=”1_3″ _builder_version=”4.13.1″ _module_preset=”default” global_colors_info=”{}”][et_pb_image src=”https://www.naturalkaos.com/wp-content/uploads/2022/03/Photo-Mar-03-9-19-18-AM.jpg” title_text=”Photo Mar 03, 9 19 18 AM” _builder_version=”4.13.1″ _module_preset=”default” border_width_all=”3px” border_color_all=”#E7D1C1″ box_shadow_style=”preset1″ global_colors_info=”{}”][/et_pb_image][/et_pb_column][et_pb_column type=”1_3″ _builder_version=”4.13.1″ _module_preset=”default” global_colors_info=”{}”][et_pb_text _builder_version=”4.13.1″ _module_preset=”default” global_colors_info=”{}”]
Shave
This is an important step before self tanning. Self tanners are likely to sink into those loosened pores, creating dark spots and an uneven finish. I shaved in the shower and used my Bosidin IPL to remove hair now and to permanently remove hair.
[/et_pb_text][/et_pb_column][et_pb_column type=”1_3″ _builder_version=”4.13.1″ _module_preset=”default” global_colors_info=”{}”][et_pb_image src=”https://www.naturalkaos.com/wp-content/uploads/2022/03/Photo-Mar-03-9-24-08-AM.jpg” title_text=”Photo Mar 03, 9 24 08 AM” _builder_version=”4.13.1″ _module_preset=”default” hover_enabled=”0″ border_width_all=”3px” border_color_all=”#E7D1C1″ box_shadow_style=”preset2″ global_colors_info=”{}” sticky_enabled=”0″][/et_pb_image][/et_pb_column][/et_pb_row][et_pb_row _builder_version=”4.13.1″ _module_preset=”default” global_colors_info=”{}”][et_pb_column type=”4_4″ _builder_version=”4.13.1″ _module_preset=”default” global_colors_info=”{}”][et_pb_image src=”https://www.naturalkaos.com/wp-content/uploads/2022/03/Photo-Mar-03-9-12-00-AM.jpg” title_text=”Photo Mar 03, 9 12 00 AM” _builder_version=”4.13.1″ _module_preset=”default” border_width_all=”3px” border_color_all=”#E7D1C1″ box_shadow_style=”preset2″ global_colors_info=”{}”][/et_pb_image][et_pb_text _builder_version=”4.13.1″ _module_preset=”default” global_colors_info=”{}”]
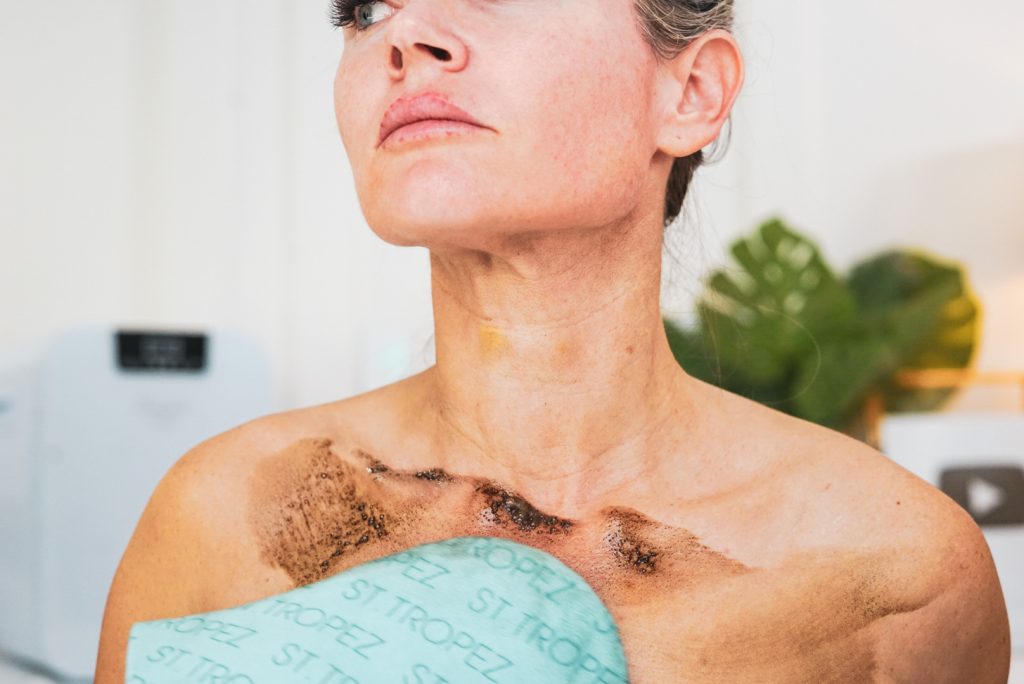
Moisturize, Use a Tanning Mitt and a Makeup Brush?!
I lotioned up after my shower because self-tan can cling to very dry areas, so make sure that your skin is well-hydrated. It’s great to hydrate your skin so the tan looks even and not patchy.
To have a streak free tan I apply fake tan with a tanning mitt. It helps to evenly distribute and blend your tan, ensuring a flawless finish every time. Also, a great tip that I received from a Viewer on TikTok was to use a makeup brush for my hands, I did and loved the outcome.
[/et_pb_text][/et_pb_column][/et_pb_row][et_pb_row column_structure=”1_2,1_2″ _builder_version=”4.13.1″ _module_preset=”default” global_colors_info=”{}”][et_pb_column type=”1_2″ _builder_version=”4.13.1″ _module_preset=”default” global_colors_info=”{}”][et_pb_image src=”https://www.naturalkaos.com/wp-content/uploads/2022/03/Photo-Mar-03-9-19-39-AM.jpg” title_text=”Photo Mar 03, 9 19 39 AM” _builder_version=”4.13.1″ _module_preset=”default” border_width_all=”3px” border_color_all=”#E7D1C1″ box_shadow_style=”preset2″ global_colors_info=”{}”][/et_pb_image][et_pb_image src=”https://www.naturalkaos.com/wp-content/uploads/2022/03/Photo-Mar-03-9-22-01-AM.jpg” _builder_version=”4.13.1″ _module_preset=”default” title_text=”Photo Mar 03, 9 22 01 AM” hover_enabled=”0″ sticky_enabled=”0″ border_color_all=”#E7D1C1″ border_width_all=”3px” box_shadow_style=”preset2″][/et_pb_image][/et_pb_column][et_pb_column type=”1_2″ _builder_version=”4.13.1″ _module_preset=”default” global_colors_info=”{}”][et_pb_image src=”https://www.naturalkaos.com/wp-content/uploads/2022/03/Photo-Mar-03-9-15-57-AM.jpg” title_text=”Photo Mar 03, 9 15 57 AM” _builder_version=”4.13.1″ _module_preset=”default” border_width_all=”3px” border_color_all=”#E7D1C1″ box_shadow_style=”preset2″ global_colors_info=”{}”][/et_pb_image][et_pb_text _builder_version=”4.13.1″ _module_preset=”default” global_colors_info=”{}”]
How to Maintain Your Tan
To keep your beautiful glowing the trick is to keep moisturizing often and don’t exfoliate. This will help your up to over a week. You can also boost your glow with a Gradual Tan Body Lotion. Bondi Sands has all of these products.
[/et_pb_text][/et_pb_column][/et_pb_row][et_pb_row column_structure=”2_3,1_3″ _builder_version=”4.13.1″ _module_preset=”default” global_colors_info=”{}”][et_pb_column type=”2_3″ _builder_version=”4.13.1″ _module_preset=”default” global_colors_info=”{}”][et_pb_text _builder_version=”4.13.1″ _module_preset=”default” global_colors_info=”{}”]
Bondi Sands 1 Hour Express Self Tanning Foam
Step 1: For an even streak-free tan, ensure your skin is clean, exfoliated, and free of any moisturizers.
Step 2: Pump foam applicator firmly. Apply Bondi Sands Self Tanning Foam liberally to a Bondi Sands Application Mitt.
Step 3: Rinse skin after one hour for a long lasting dark tan.
Leave 1 Hour Express Self Tanning Foam on the skin for 30 minutes for a Light/Medium tan, 1 hour for a Bronze tan, and 3+ hours for the darkest result.
[/et_pb_text][et_pb_image src=”https://www.naturalkaos.com/wp-content/uploads/2022/03/Photo-Mar-03-9-18-52-AM.jpg” title_text=”Photo Mar 03, 9 18 52 AM” _builder_version=”4.13.1″ _module_preset=”default” border_width_all=”3px” border_color_all=”#E7D1C1″ box_shadow_style=”preset2″ global_colors_info=”{}”][/et_pb_image][/et_pb_column][et_pb_column type=”1_3″ _builder_version=”4.13.1″ _module_preset=”default” global_colors_info=”{}”][et_pb_image src=”https://www.naturalkaos.com/wp-content/uploads/2022/03/Photo-Mar-03-9-11-26-AM.jpg” title_text=”Photo Mar 03, 9 11 26 AM” _builder_version=”4.13.1″ _module_preset=”default” border_width_all=”3px” border_color_all=”#E7D1C1″ box_shadow_style=”preset2″ global_colors_info=”{}”][/et_pb_image][/et_pb_column][/et_pb_row][et_pb_row _builder_version=”4.13.1″ _module_preset=”default” global_colors_info=”{}”][et_pb_column type=”4_4″ _builder_version=”4.13.1″ _module_preset=”default” global_colors_info=”{}”][et_pb_text _builder_version=”4.13.1″ _module_preset=”default” global_colors_info=”{}”]
Sol Tanning Drops
I used the Sol tanning drop by Jergens with my moisturizer. I ended up putting in 10 drops and it was a perfect match to my tan. I am so glad I purchased these drops, they are a must and so cheap compared to other tanning drops.
Overall I achieved a great self tan and you can see the full reveal here:
Watch the Video below to see how I prepped and applied my tan.
[/et_pb_text][et_pb_video src=”https://vimeo.com/684446509″ _builder_version=”4.13.1″ _module_preset=”default” global_colors_info=”{}”][/et_pb_video][/et_pb_column][/et_pb_row][/et_pb_section]